Difference between revisions of "PuTTY using key-pair authentication"
Jump to navigation
Jump to search
| Line 1: | Line 1: | ||
= Configure PuTTY = | = Configure PuTTY = | ||
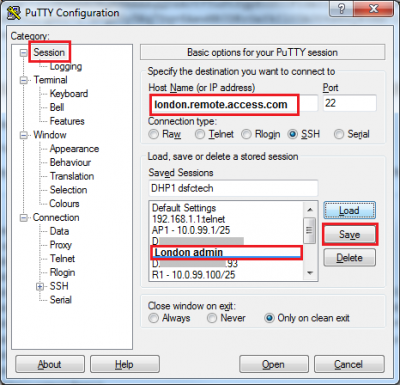
* Open putty, name the new session here '''London admin''' and add host/IP | * Open putty, name the new session here '''London admin''' and add host/IP. In the example below it is '''london.remote.access.com''' server, then press save. The new connection '''London admin''' will be created. | ||
:[[File:01-name-session.png|400px|Create new session]] | :[[File:01-name-session.png|400px|Create new session]] | ||
Revision as of 16:59, 18 November 2013
Configure PuTTY
- Open putty, name the new session here London admin and add host/IP. In the example below it is london.remote.access.com server, then press save. The new connection London admin will be created.
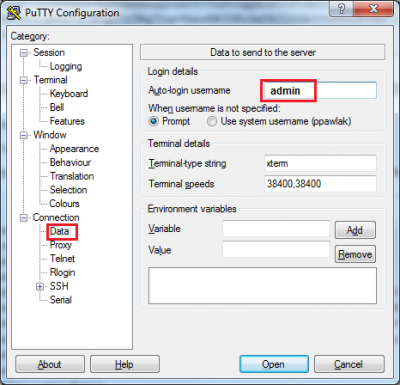
- Optionally enter Auto-login username, example admin in Connection > Data section.
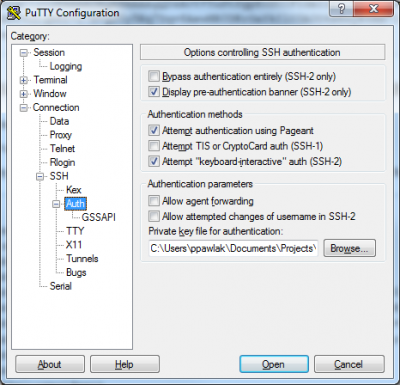
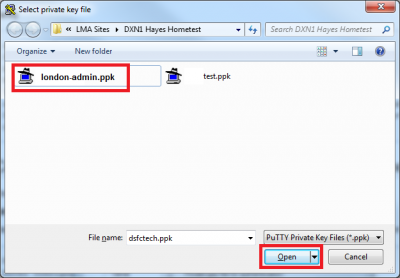
- Choose private key used for authentication. Go to Category Connection > Auth and press Browse.
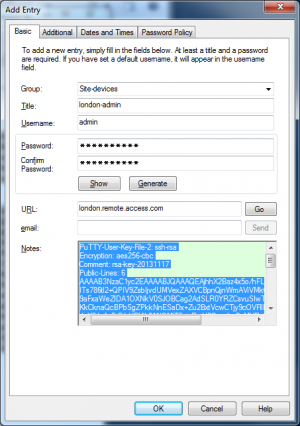
- Full content of the file can be stored in the company Password Safe in notes. Copy all notes into text editor and saving with PPK extension will re create the needed file.
- Save session by going to Category: Session and press Save.
Connect
Open PuTTY, press load London admin, you should not be asked for username
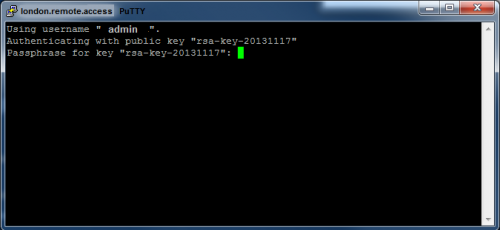
Enter 'Passphrase for key' that is password used to code the private-key. It was chosen at the time of key-pair creation. After then you will be logged in without any additional prompt for the username password.
